Photos app on Windows 10 comes as a built-in app and it has plenty of useful features. If you are looking for tools for basic editing, you will find them there. In addition, the app comes with the option that allows you to add filters to your images. And if that’s something you want to do, we are going to show you the steps. Without further ado, let’s see how to add filters to images in Photos app on Windows 10.
See also: How to crop and rotate images in Photos app on Windows 10
How to add filters to images in Photos app on Windows 10
Filters are pretty popular, and they are also a very simple and convenient way to edit an image and give it a special touch with just a click. Let’s see how you can add the filters in the Photos app:
- Open the image you want in the Photos app on your laptop or desktop
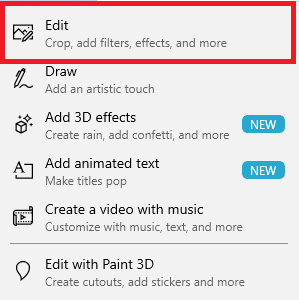
- Next, click on the option Edit & Create
- In a drop-down menu, click Edit
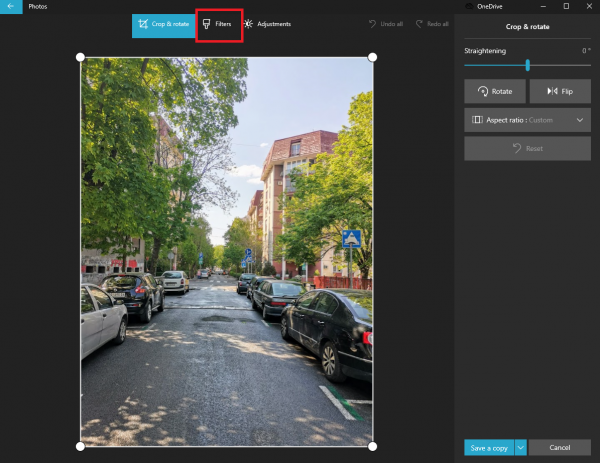
- Now click Filters
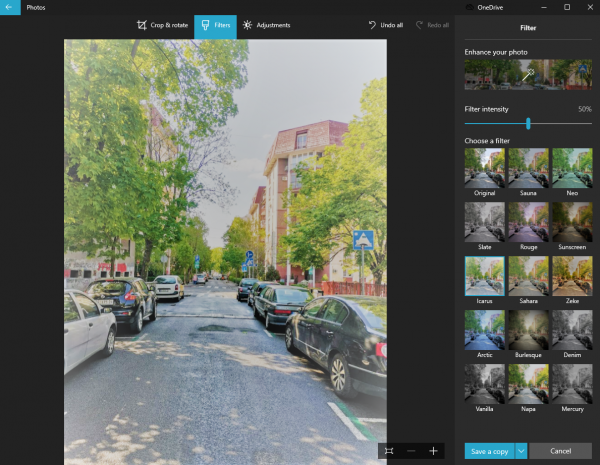
- Select the filter you like
- You can also set its intensity by drawing the dedicated slider
- Once you are done, click on Save a copy
- Select the folder in which you want the photo to be placed
- Done!
As you can see, adding filters in the Photo app is pretty simple and with this handy tool, you can change the image within seconds!