

Most people use several email accounts, each with its address book. Windows 10 implements the ability to add contacts from all of your accounts in a single address book. Using the application “People App,” you can combine a bunch of information about various people in one list with their addresses, contacts, and other data. This application can be found in the “Start” => “All Applications,” and the list of people is in alphabetical order. Each contact has a lot of information about a person (name, phone, address, email address, website, and more). Easily search for the information you need about the person who can change any of its data. This guide will show you how to add contacts from Gmail, Outlook, and more to your Windows 10 address book.
How to Add Contacts from Gmail, Outlook, and More to Windows 10’s Address Book
Add contacts from Gmail, Outlook, or any other account.
If you have contacts in Gmail, Outlook, or iCloud – adding them to the application “People” in Windows 10 is easy. Open the app => and tap the Import contacts button. 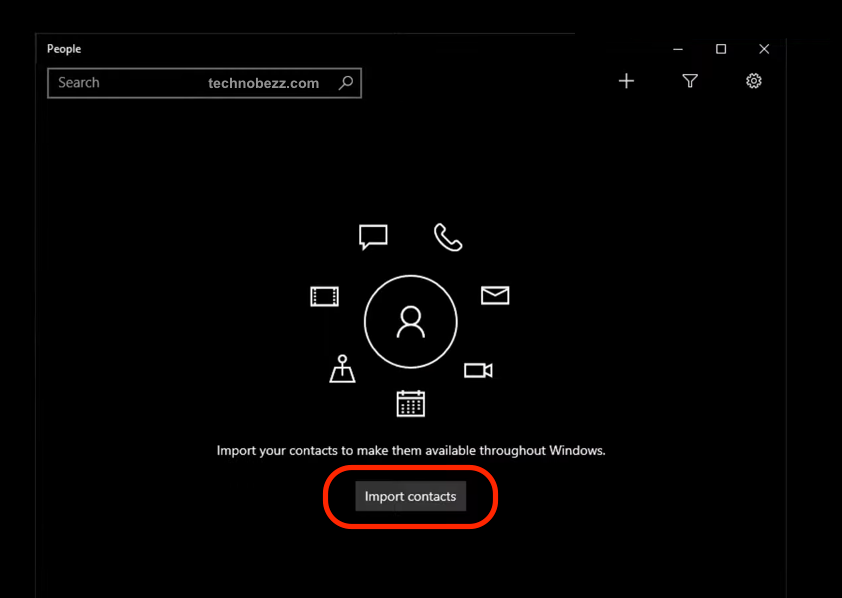 In the open window, you will see the mailboxes connected at the moment, and you will be able to add a new account. In the next window, select the account you want to connect to => enter further account details and do everything according to the instructions. After connecting to the new account, in the application “People,” – you’ll see the list of all your contacts and their information.
Adding new contacts to the People app
To add a new contact – you need to click on + above the search box.
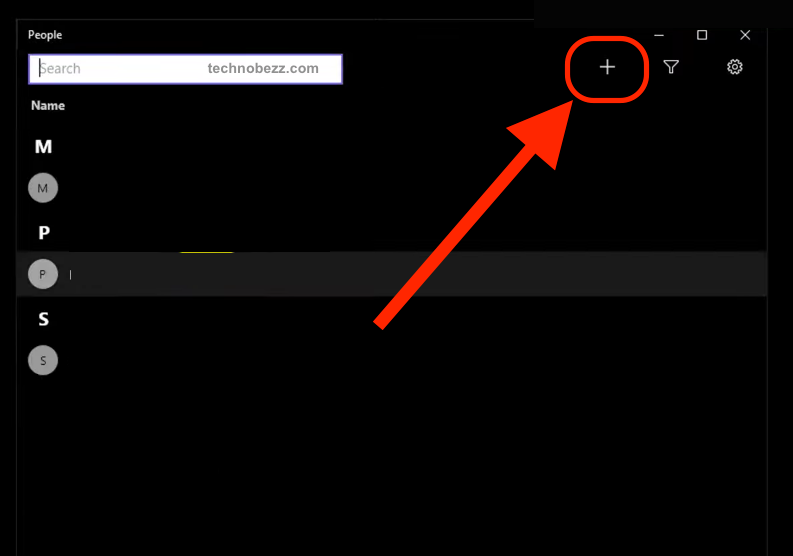
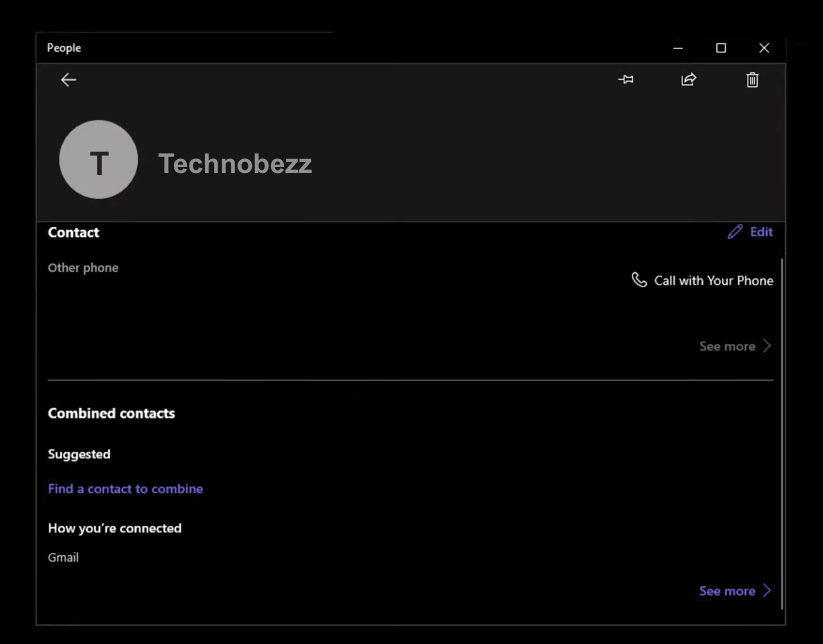
If you have many accounts configured – the following window will ask you to choose the account to which you want to create a contact. If you have one account – just open the window to fill in the contact information. In the window for a new contact, you can: set a user picture, entering the home address, phone number, birth date, email address, etc. You can change, for example, where “mobile phone” is written – you can click on it and change it to “home,” work, etc.
To add additional information about the contact – click “Advanced,” and you’ll get a list: date of birth, website, company, title, office location, partner, children, anniversary, notes… You can also edit existing contact: select a contact, and at the top right, choose a pencil icon; you can also click on contact by right-clicking the mouse button and selecting “Change,” and it will be the same settings as adding a new contact.
Image source: wccftech.com
