
Seeing that "No SIM" message on your Google Pixel 9a is a real roadblock, especially when you need to make a call or send a text right now. This issue can pop up for a few reasons, but I've found most of them are pretty straightforward to fix on your own.
Start With a Force Restart
This is often the quickest fix for a temporary glitch. Press and hold the Power button on the side of your Pixel 9a for about 30 seconds. Keep holding it even after you see the Google logo or feel a vibration. The phone will force itself to restart, which can clear up minor software hiccups that cause the SIM to go unrecognized.
Check Airplane Mode and Your SIM Status
Swipe down from the top of your screen twice to open the full Quick Settings panel. Tap the Airplane Mode icon to turn it on, wait about ten seconds, and then tap it again to turn it off. This resets your phone's radio connections.
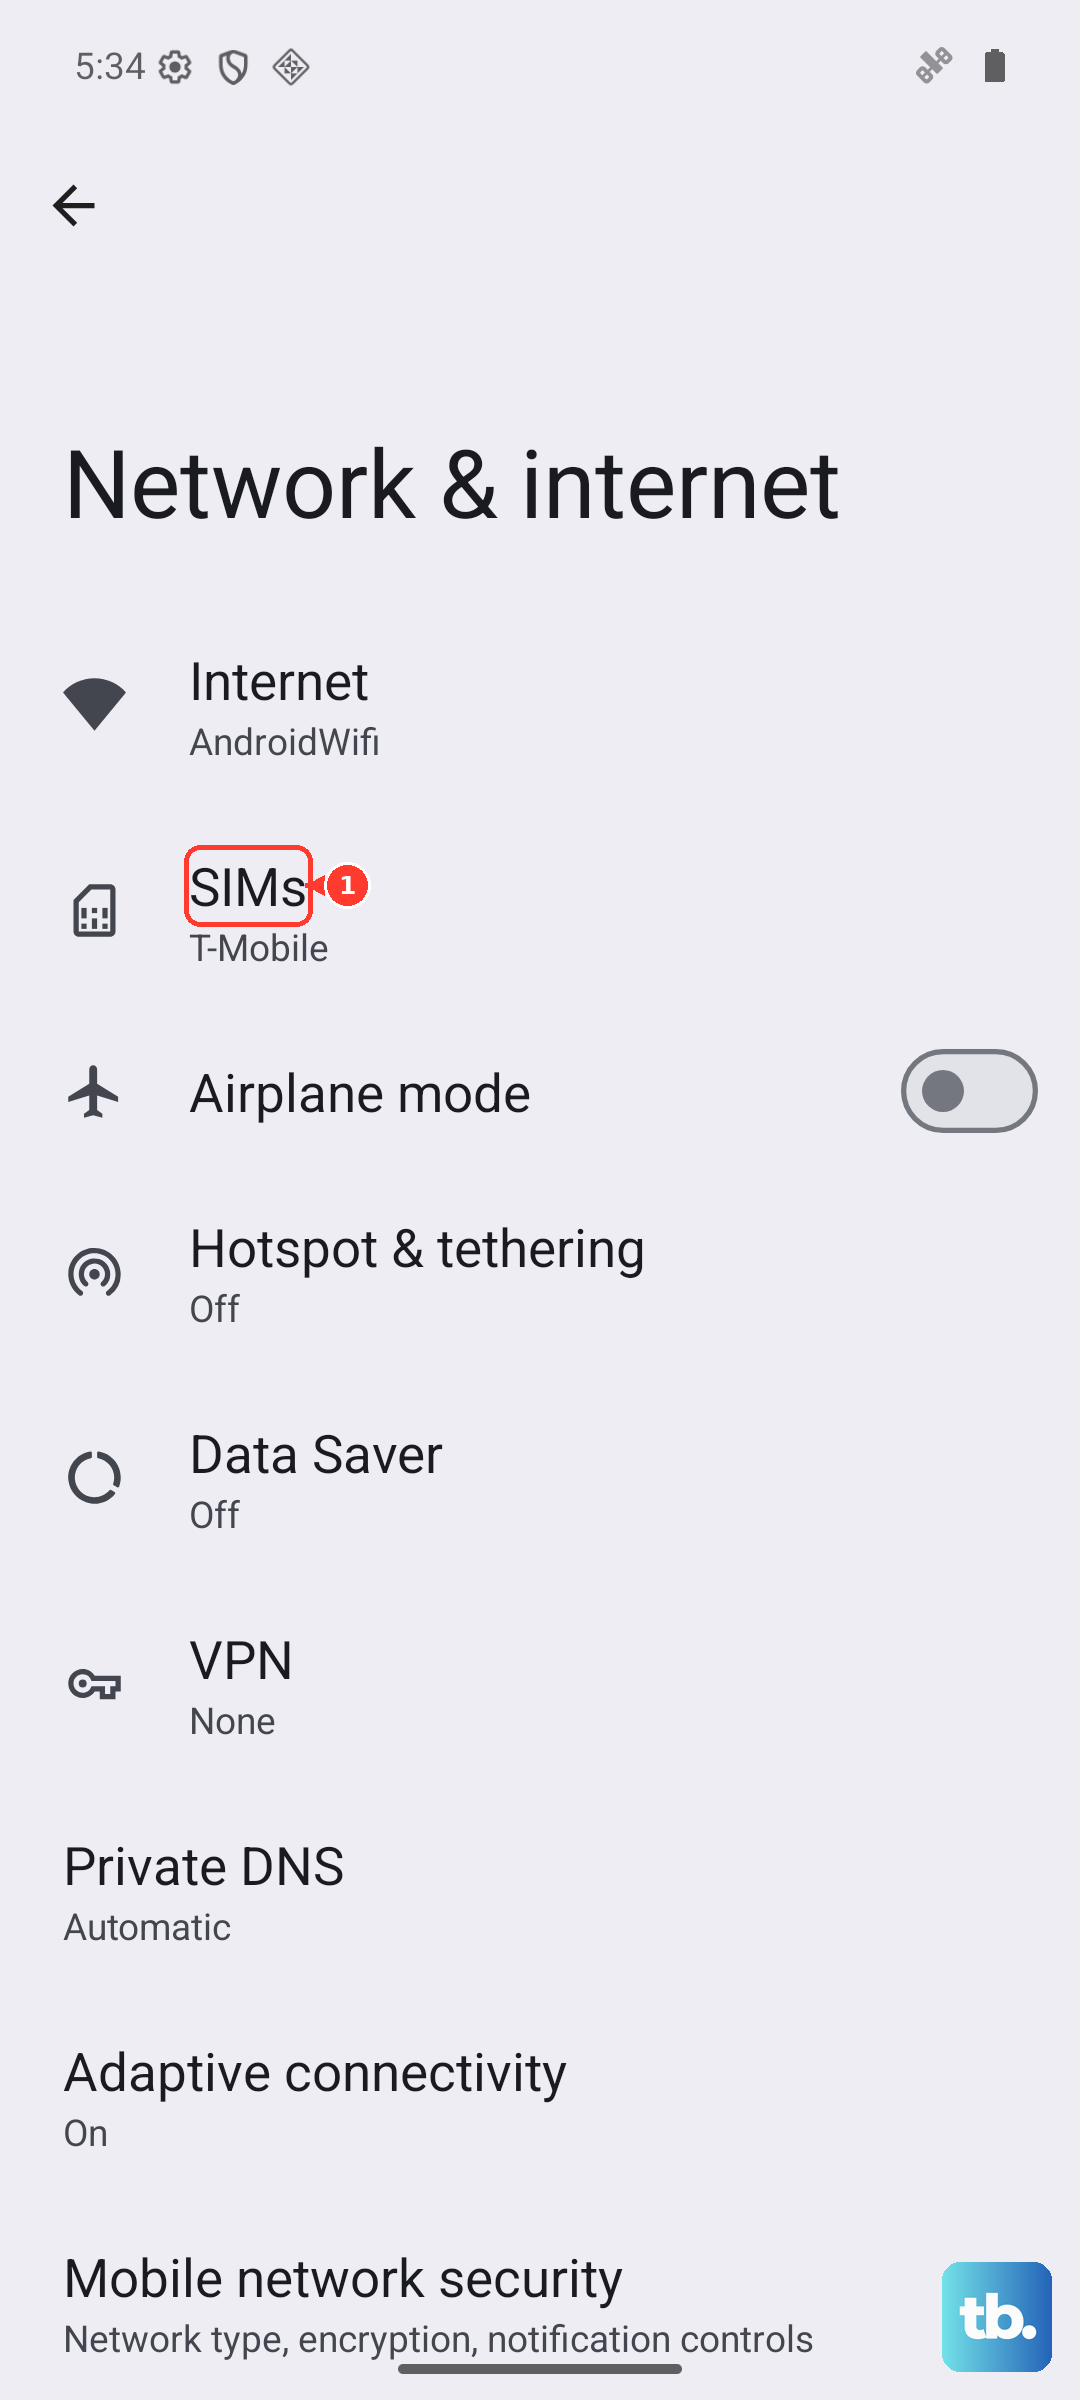
Next, go into your settings to make sure the SIM is actually enabled. Open Settings > Network & internet > SIMs. Here, you should see your SIM card listed. Tap on it and make sure the "Use SIM" switch is turned on. Sometimes a software update or an app can accidentally toggle this off.
Inspect and Clean the Physical SIM
If the software steps don't work, it's time to check the hardware. First, power your Pixel 9a off completely. Find the SIM ejector tool that came in the box (a paperclip works in a pinch) and gently push it into the small hole on the SIM tray, usually on the bottom edge of the phone.
Carefully pull the tray out and remove the SIM card. Take a close look at the gold contacts on the card. Look for any scratches, discoloration, or tiny specks of dust. Gently wipe the contacts with a clean, dry microfiber cloth. Blow any dust out of the SIM tray slot on the phone itself. When reinserting, make sure the card is seated correctly in the tray and that the tray goes back in smoothly without forcing it.
Test Your SIM in Another Phone
This is the best way to figure out if the problem is with your SIM card or your Pixel 9a. If you have access to another unlocked phone, power it off, insert your SIM, and turn it back on. If that phone also shows "No SIM," then the issue is definitely with the SIM card itself. You'll need to contact your carrier (like Google Fi, T-Mobile, or Verizon) to get a replacement SIM sent to you.
If the SIM works perfectly in the other phone, then the issue is localized to your Pixel. This points more toward a software setting or, less commonly, a hardware problem with the phone's SIM reader.
Update Your Pixel's Software
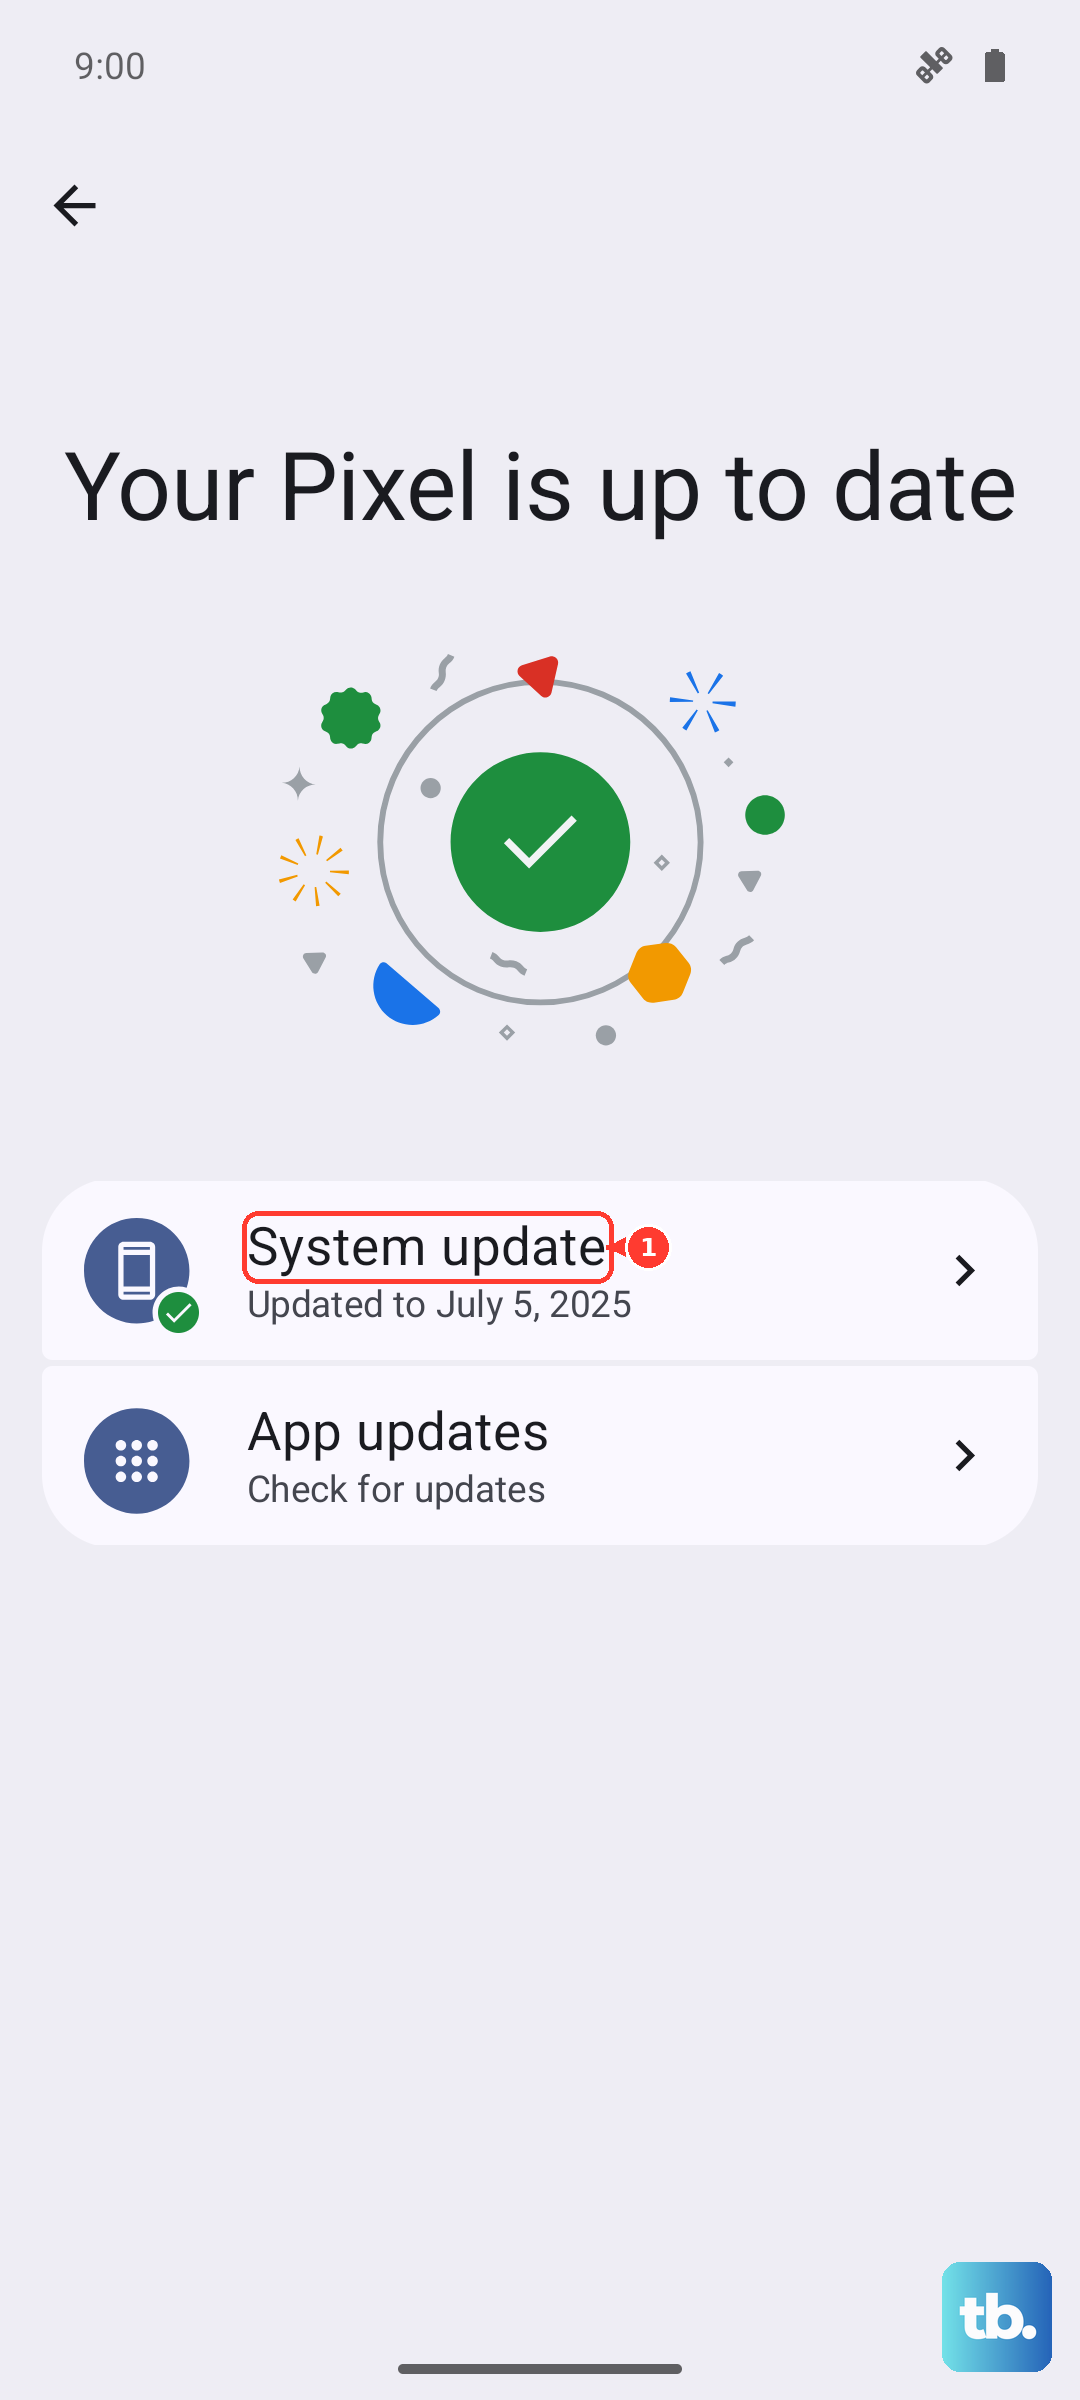
Since you're running Android 15, Google is constantly pushing out updates that fix bugs, including ones related to network connectivity. Go to Settings > System > System update. Tap "Check for update." If an update is available, download and install it. It's a good idea to be connected to Wi-Fi and have your phone plugged into a charger, like a 30W USB-PD charger, for this process. After the update, restart your phone and check if your SIM is detected.
Reset Your Network Settings
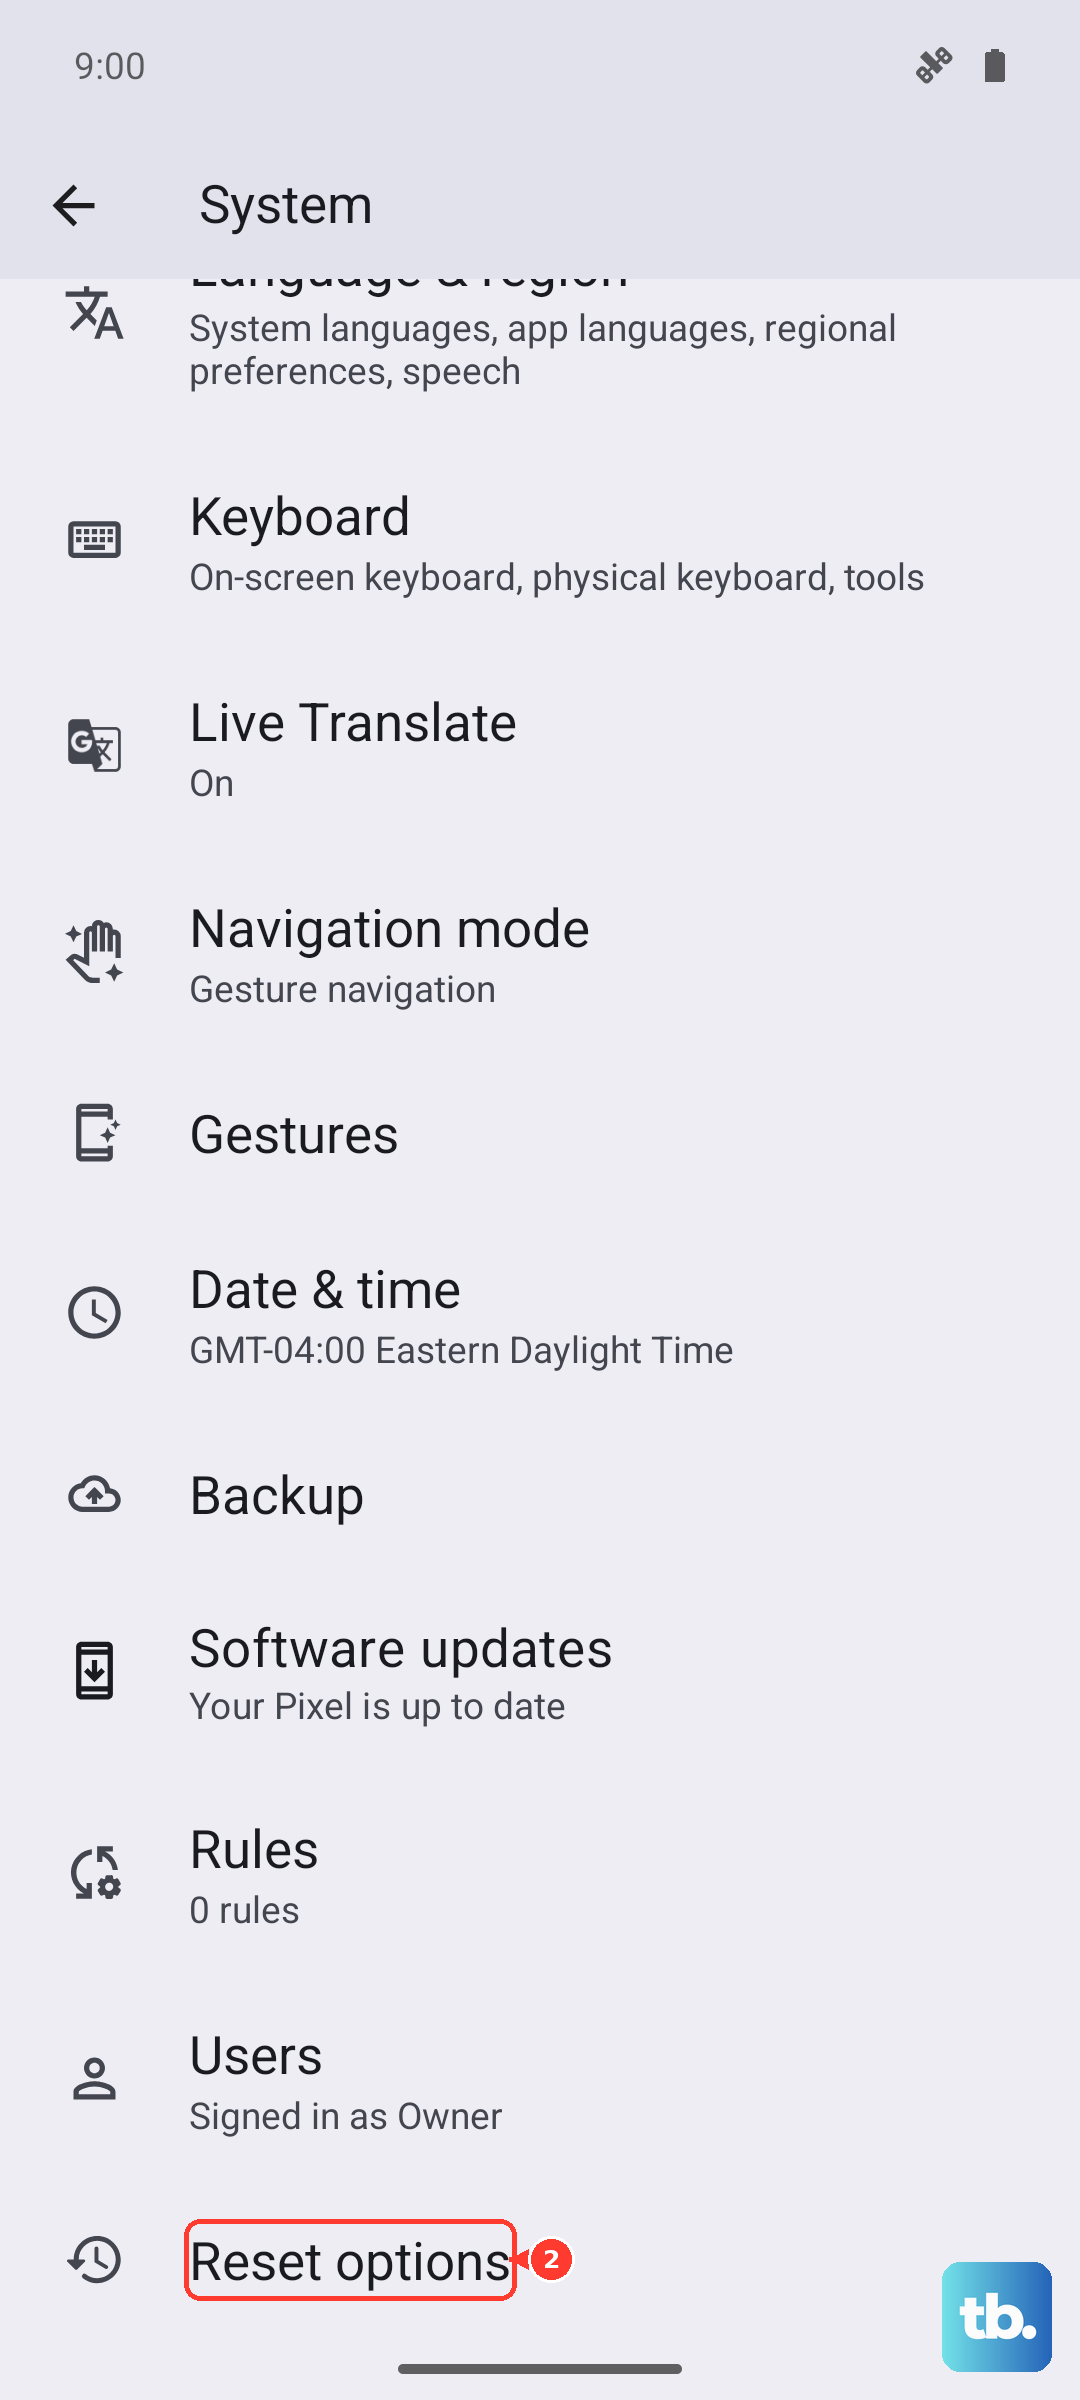
This will wipe all your saved Wi-Fi networks, Bluetooth pairings, and cellular network preferences back to factory defaults, but it won't touch your personal data like photos or messages. It's a powerful step for clearing out corrupted network configurations. On your Pixel 9a, go to Settings > System > Reset options. Tap Reset Wi-Fi, mobile & Bluetooth and confirm. After the reset, you'll need to reconnect to Wi-Fi and re-pair Bluetooth devices, but it often resolves persistent SIM issues.
Check and Reset Your APN Settings
The Access Point Name (APN) tells your phone how to connect to your carrier's mobile data network. If these settings are wrong, you might see a "No SIM" error or have no data. Go to Settings > Network & internet > SIMs > tap your SIM > Access Point Names.
You should see a list, often with one selected. Tap the three-dot menu in the top right and select "Reset to default." This will load the standard APN for your carrier. If you still have issues, your carrier's website or support team can give you the exact APN settings to enter manually.
Try Manual Network Selection
Sometimes letting your phone automatically choose a network can fail, especially in areas with weak coverage where the Tensor G4 modem might struggle. You can force it to connect to your specific carrier. Go to Settings > Network & internet > SIMs > tap your SIM. Look for "Network" or "Carrier" and tap it. Turn off "Automatically select network." Your phone will search and present a list. Select your carrier's name from the list. Wait a minute to see if the connection stabilizes.
Consider Switching to an eSIM
The Pixel 9a supports eSIM, which is a digital SIM profile downloaded to your phone. If your physical SIM tray or card seems problematic, moving to an eSIM can be a permanent solution. Contact your carrier's support and ask if they support eSIM activation for the Pixel 9a. They can guide you through transferring your number to an eSIM, which usually involves scanning a QR code from your phone's settings. This completely bypasses the physical SIM tray.
Perform a Factory Reset
This is your last resort for a software-related problem. A factory reset will erase everything on your phone, so you must back up your photos, messages, and app data first. Use Google One backup or manually transfer files to a computer. Once backed up, go to Settings > System > Reset options > Erase all data (factory reset). Follow the prompts. After the reset, set up your phone as new initially to test if the SIM is recognized before restoring your backup.