Developer Options is a secret tool which can be activated on all Android handsets. The option is meant for developers who need extra functions so they can test applications and software they are designing for Android-based devices. Once the Developer Options is enabled you get a list of different features to use. Android Oreo 8.0 is already out and users can’t stop smiling over the exclusive features that they have access to. With the Developers Options enabled on their smartphone they can do so much more. Before we discuss what additional things you’ll be able to do, here is how to enable developer options on Android Oreo.
Read also- How to Turn On Wi-Fi Automatically On Android Oreo
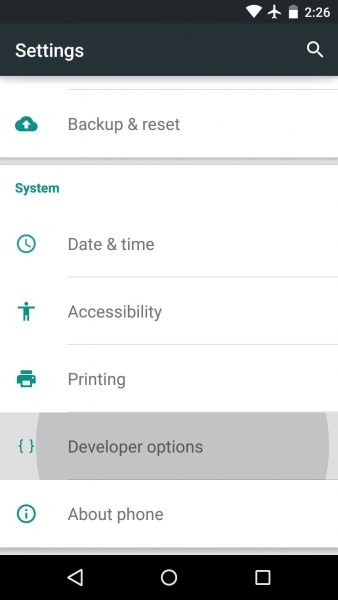
Steps to Enable Developer Options on Android Oreo
- In any Android Oreo 8.0 device head over to Settings of the smartphone
- Go to System and under this tap on About Phone
- Scroll down to the bottom of this page and look for Build Number
- You need to tap seven times on Build Number to enable the Developer Options on Android Oreo.
- The smartphone will instantly pop a message saying ‘You are Now a Developer’
- In order to access the Developer Options go back to Settings and under System you will be able to see the Developer Options.
After you enable the Developer Options on Android Oreo you have access to various handy and helpful features. Here is a list of them:
- Under the Developer Options menu, you will see options for Transition animation scale, Window animation scale and Animator duration scale. These options when scaled down help in speeding up your Android phone. For those who feel their device is slow the change makes it fast while for devices that are already fast will feel it become tetchier. Keep it on 0.5x level so that the apps continue to be bug-free. The speed in which you switch between apps is what Transition animation can control. A Window animation takes care of the speed at which windows of apps open and close. The in-app animations like buttons or menu tapping are what the animator duration controls.
- There may be people who would like to record their screen – YouTuber’s who prepare tutorials for app demos or gaming exploits etc. If you enable Developer Options on Android Oreo you will be able to do so. All you need to do is connect your device to a computer the Android Studio package will let you record all that is happening on your screen.
- You can easily fake the GPS location of your device with Developer’s Options. When you don’t want your friends and family or the apps to read your location then you can use the Select Mock Location App under the Developers Options and set up a spoof location.
- Developers Options is mainly enabled by the users to root and install other OS. You can easily install a ROM of your choice. You can install advanced apps such as file undeleters and create full backups of your entire phone. A word of advice, although if you enable Developer Options on Android Oreo, it doesn’t hamper the warranty of your device but installing other OS or rooting does. So before you use the options to do something or are trying to explore more options then you should be ready for what would come ahead as you won’t have any warranty.
- For those who love playing games, there are some cool features such as the advanced graphics processing that will enhance the user experience of Android Oreo users. The Force 4x MSAA when activated lets you play games that look and feel better than what they actually used to.
These are just some of the useful features that have been listed. If you want to exploit the true features of Android then enable Developer Options on Android Oreo.
Read also- How to Install Android 8.0 Oreo
Also Read


Recent
Ottocast Car TV Mate Max Review – A Versatile In-Car Entertainment Adapter
iPhone Battery Dying In Minutes? 23 Real Fixes That Work
Ottocast Play2Video Pro Ups the Game in Affordable Car Entertainment
Ottocast OttoAibox P3 Powers a Smarter Driving Experience
How to Disable WebRTC in Your Browser Settings
Guides

Lenovo Debuts Solar-Charging Laptop That Turns 20 Minutes of Sunlight Into Hour of Video

Why Do Smartphones Get Slower Over Time?

Decoding Tech Jargon: The A to Z Cheat Sheet (Free Downloadable PDF)

How to Clear an App's Cache on Your Samsung Device

Why Are My iPhone Messages Green Instead of Blue?

Everything Google Knows About You (And How to Stop It)
