In case you just installed Windows 10, or you purchased a desktop computer or a laptop with Windows 10, you will probably have to change some settings, including the screen resolution. That is exactly what we are going to show you here – how to change screen resolution in Windows 10.
If you are new to Windows OS, there is nothing to worry about, as everything is straightforward and very simple. We will show you how to set a display resolution that suits you the most, and all you need to do is follow our guide below. Let’s begin.
See also: How To Force Quit Programs In Windows 10
How to change screen resolution in Windows 10: From Settings
There are many things you can change on your Windows 10 machine, and for most of it, you can use different methods. The same goes for screen resolution. The first method we are going to show you is to go from Settings. Just follow the steps below:
- Click the Start button in the bottom-left corner of the screen
- Now click on the gear icon to open the Settings

- Next, click on System
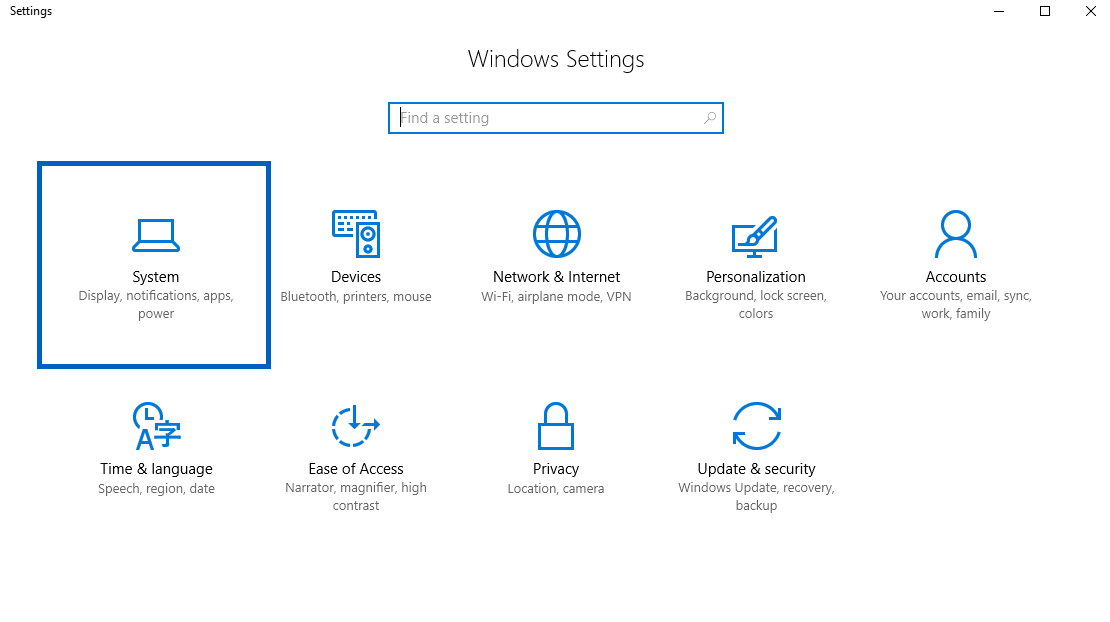
- You will be on a Display Settings Page
- Scroll down and click Advanced Display Settings
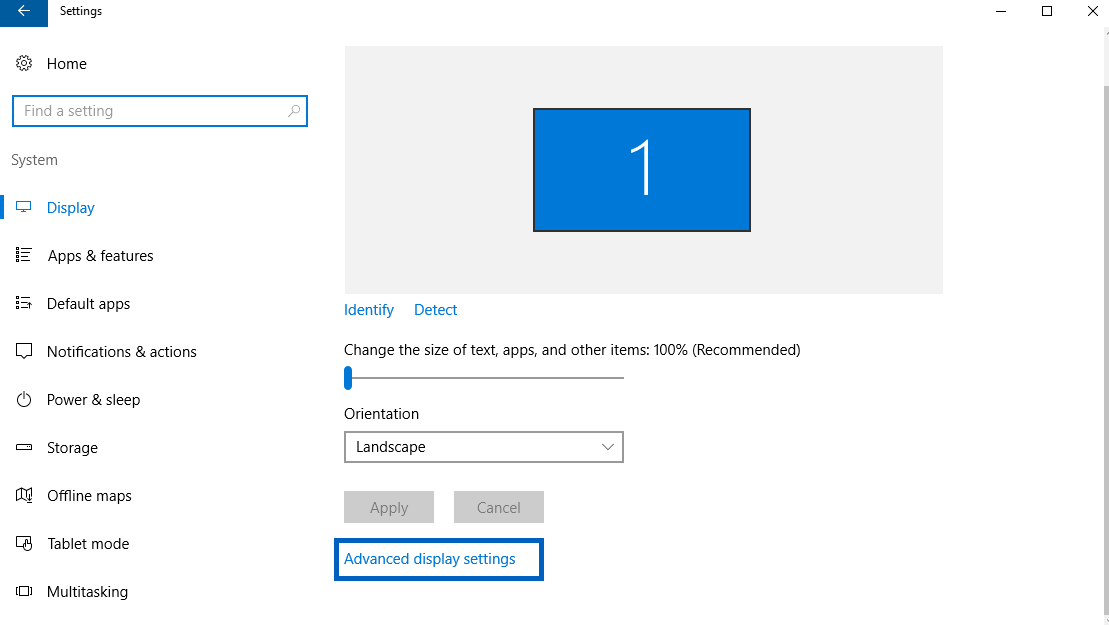
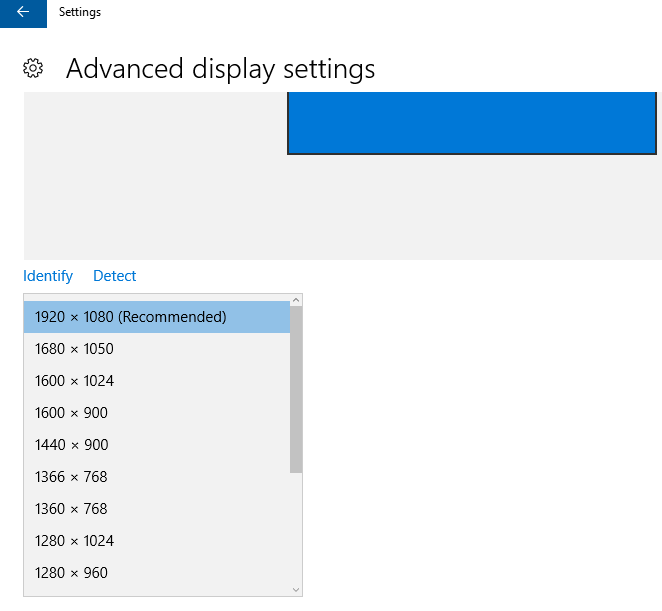
- Again, scroll down and you will see Resolution
- Click on the box and select the resolution that suits you the most
- When you are done, select Apply
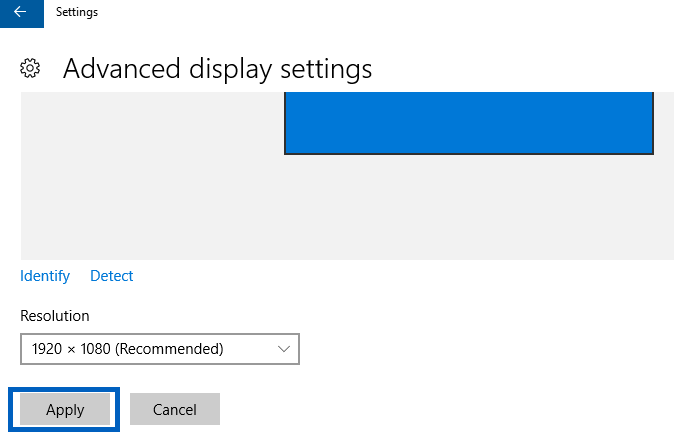
That’s it. You have just changed display resolution in Windows 10.
How to change screen resolution in Windows 10: From Desktop
But, is the method above the only one? No, it’s not. You can do the same from a desktop, so all you need to do is choose the option that you find more suitable. Follow the steps below:
- Go to your Windows 10 desktop
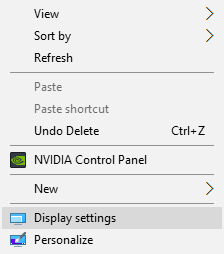
- Right-click on the empty area
- Choose Display Settings
- Again, scroll down and click Advanced Display Settings
- Choose the resolution you want, and then click Apply.
You are done, and you have just changed the screen resolution in Windows 10. Both options to do so are very simple, so choose the one you like and make the changes according to your needs and desires.


