

Tech Insights in Your InboxSubscribe to our free newsletter and never miss out on what's happening in the tech world. Learn Tech Today, Lead Tomorrow.
If you have more than one computer on your network and want to manage it, you must enable the Active Directory Users and Computers first. The steps for enabling this vary, depending on your current Windows version.
Active Directory Windows 10: How to enable it for version 1803 and lower versions
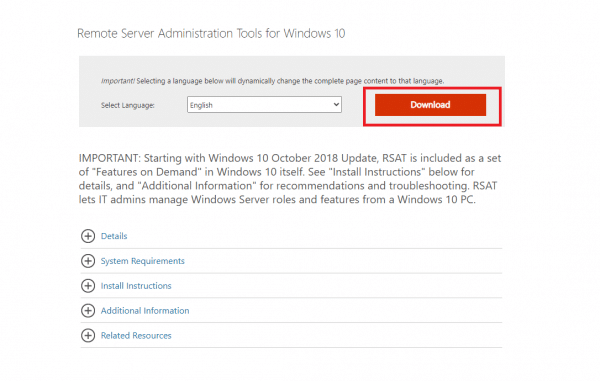
- Open your browser and go to Microsoft Download Center to get Remote Server Administration tools.
- Once you are on the page, click on the Download
- Select the latest version and then click Next
- Open the Control Panel on your computer, go to Programs, and click on Programs and Features
- Click on Turn Windows Features on or off, located on the left side of the window.
- Click on the plus next to Remote Server Administration Tools to expand the menu.
- Next, click on Role Administration Tools, then select AD LDS and AD DS Tools.
- Finally, click the OK button.
Once you are done, Administrative tools will appear in the start menu.
Active Directory Windows 10: How to enable it for version 1809 and higher versions
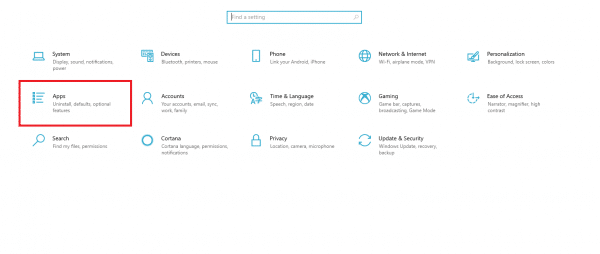
- Click on the Start button in the bottom-left corner, then click on the gear icon to access the Settings.
- Next, click Apps
- Click on Optional features

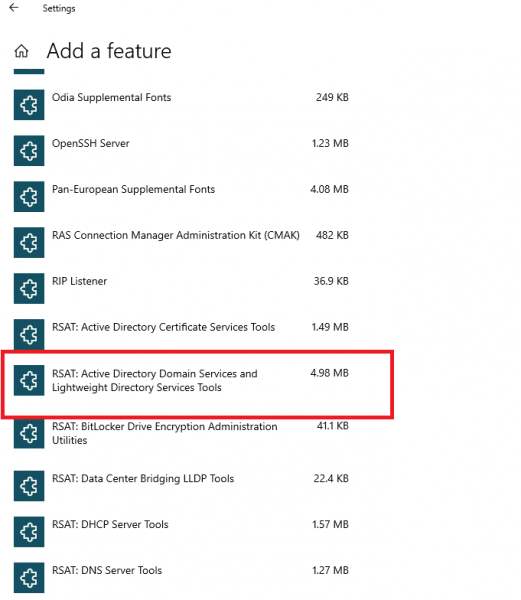
- Now click on Add a feature
- Scroll down until you find the RSAT: Active Directory Domain Services and Lightweight Directory Tools and click on it
- Click Install
Wait for the installation to finish. Once completed, administrative tools will show up in the start menu.
Be sure to follow us
Join our newsletter
Subscribe to our newsletter and never miss out on what's happening in the tech world. It's that simple.
Be sure to follow us